Tap 'n' Sniff #2 - How to create your own sniffer firmware and sniff on an enterprise MFP
Author: Mathis HagenDate: 2017-05-24 14:59:17
Content Table
| Introduction |
| Requirements |
| Configuring and building the image |
| Installing the image |
| Demonstration |
Introduction
After learning how to transform a pocket router into a LAN sniffer in our last article we wanted to make our life a little bit easier. So we created an preconfigured image which we only need to install via the TP-LINK web interface or a SSH shell like described later in this article. After a reboot we will have a functioning LAN sniffer. This will take 3 minutes instead of 30 and makes an internet connection obsolete. The creation of the image takes quite a lot of time so if you do not have a few hours of time for compiling, you can also download the image at our GitHub. If you plan on getting such a device be warned since TP-LINK recently published the TL-WR810N V.2.0 which is featuring less storage space, missing the USB port and is unable to run OpenWrt. And it only costs 5 Euro more, sweet. There are still routers out there with Version 1.1 but they will be harder to get with time. Nonetheless this article is still about creating Firmware for OpenWrt devices, transforming them into LAN sniffers and can be adapted for any device running OpenWrt and featuring 2 LAN ports and WI-FI.
Requirements
First of all you do need some things installed before we can start, namely the following packages:
git-core build-essential libssl-dev libncurses5-dev unzip gawk and subversion
You will also need an active internet connection until you have finished compiling your image because the image builder needs to download additional files while compiling.After installing named packages we can now pull the current Version of the OpenWrt image builder from git and install it in our building directory.
mkdir build cd build git clone https://github.com/openwrt/openwrt.git
Now that we have the image builder we can update its feeds to use the most recent package sources and install them for later use. For the sake of simplicity we are going to update and install all of them. The builder does have a script for updating and installing located at ./scripts/feeds.
cd openwrt ./scripts/feeds update -a ./scripts/feeds install -a
Now we are ready to configure our image.
Configuring and building the image
The image builder has a simple GUI used for the configuration of our image. It is started with
make menuconfig
Using this GUI we can select everything that has to be included in the image together with some other options we don't care about now. There is a preconfigured package set for our device and we can load it by selecting target profile and then choosing TP-LINK TL-WR810N. Now we can add and remove packages at will by selecting them and pressing y for them to be precompiled and added to the image or n to not include the package. For now we will only add packages, namely python-light (Languages -> Python -> python-light), netcat (Network -> netcat) and tcpdump (Network -> tcpdump). Feel free to add more packages if you feel like you will need them but keep in mind the limited storage space on our router. If you do not get an *-sysupgrade.bin after compilation your firmware was to big to be installed on the target system and you have to make it smaller by selecting fewer modules.After choosing all packages we can save our configuration and exit the GUI. Now we were finished if not for our custom config and init.d files. For them to be included we have to create a directory called files and then place our files there under the path we want them to be saved in our image, in our case etc/config and etc/init.d. The problem with our previous files is that they were executed after we disabled the network and firewall init scripts manually and we can't or rather do not want to do so now. Our solution was pretty straightforward, we simply added the command to disable these scripts in our own script. So after the first boot the network and firewall scripts are deactivated and won't start again until manually reactivated. The only downside of this is the need to reboot the sniffer once to get it fully operational.
mkdir files mkdir files/etc mkdir files/etc/config mkdir files/etc/init.d vim files/etc/config/hostapd.conf interface=wlan0 ssid=your_ssid hw_mode=g wpa=2 wpa_passphrase=your_password wpa_key_mgmt=WPA-PSK ignore_broadcast_ssid=1 vim files/init.d/sniffer #!/bin/sh /etc/rc.common START=99 #tells OpenWrt in which order the scripts in /etc/init.d/ are to be started, 99 is per default the last entry STOP=99 #same as start but stop start() { echo start #/etc/init.d/network stop /etc/init.d/network disable #/etc/init.d/firewall stop /etc/init.d/firewall disable #/etc/init.d/odhcpd stop /etc/init.d/odhcpd disable ifconfig wlan0 up #the WiFi is not activated by default ifconfig wlan0 192.168.2.1 #since we disabled odhcpd we have to give our interface an IP manually ifconfig eth0 up #we need to bring our LAN interfaces up manually since we disabled network ifconfig eth1 up brctl addbr br0 #create a new bridge interface ifconfig br0 up #bring our new bridge interface up brctl addif br0 eth0 #add interface eth0 to bridge br0 brctl addif br0 eth1 #add interface eth1 to bridge br0 dropbear -p 192.168.2.1:22 #tell dropbear to listen on the WiFi interface on port 22 for incoming SSH connections hostapd /etc/config/hostapd.conf #start our AP } stop() { echo stop ifconfig wlan0 down #take our WiFi interface down killall hostapd #stop hostapd }
Now we can start our build by simply typing
make
. Don't worry, this will take a pretty long time, depending on your CPU. If, for some reason, you encounter an error you can get the full console output by runningmake V=s
or get only the errors as output while saving the full output to build.log by runningmake V=s 2>&1 | tee build.log | grep -i error
After the compilation is finished you should find a file called "openwrt-ar71xx-generic-tl-wr810n-squashfs-sysupgrade.bin" at build-dir/bin/ar71xx/. This file can be used for a system upgrade while the -factory.bin file is used for an installation via serial console or ftp server. If you do not find such a file but some similar files with only the two named before missing you most likely selected to many packets and the image got to big for the internal flash drive and you need to exclude some packages. If you encounter other errors check out the builder manual guide.Installing the image
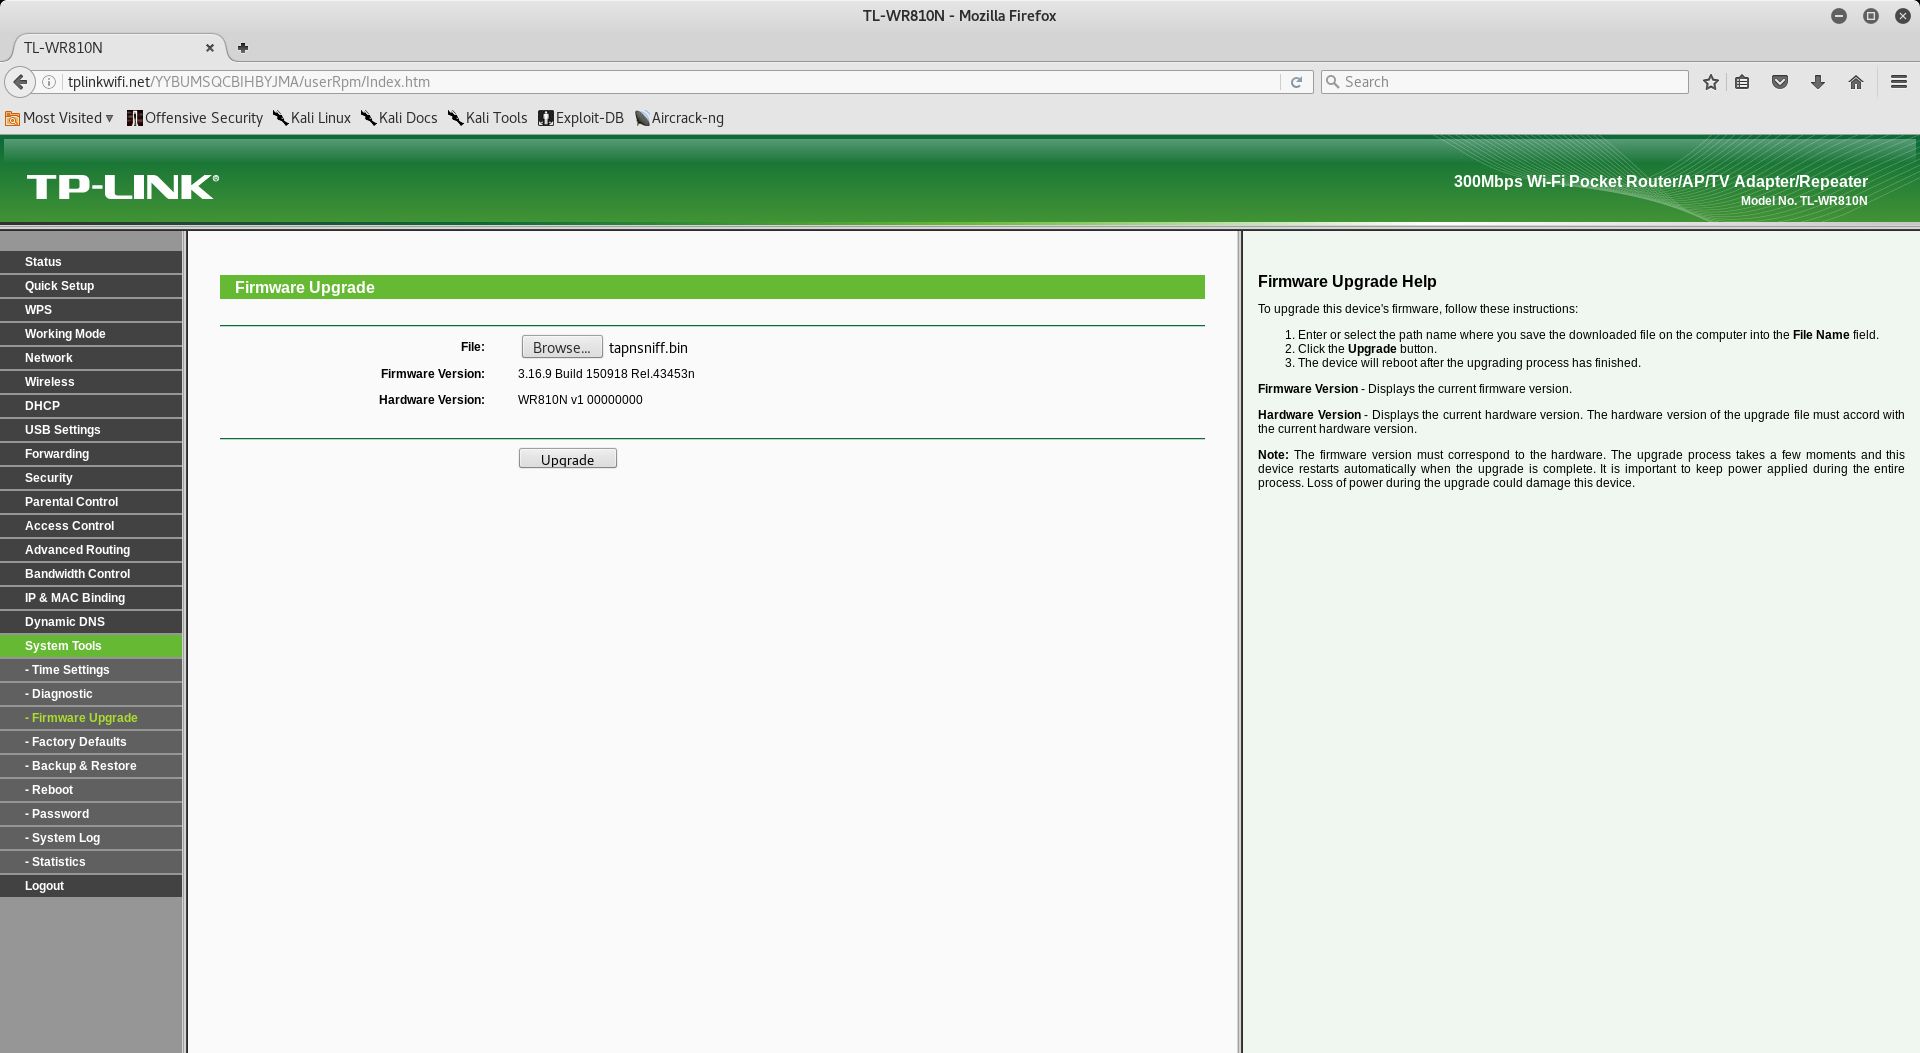
If you have a fresh router with TP-Link firmware on it you go to the Option Firmware upgrade in the Web interface and install the image by uploading it there. If you rather want to do an upgrade via a SSH session you can do so using
sysupgrade -n path/to/image
where the -n flag tells the system to delete the config files too. If you do not know how to establish a SSH session with the router, you may have a look at our previous article.Demonstration
As a proof of concept we documented a testing scenario in which we used a TL-WR810N to tap a printer and sniff a Document being printed.
First we connected to the routers WiFi named TP-LINK_AXXX and then visited tplinkwifi.net where we had to log in using the default admin:admin combination. After login we started the system upgrade.

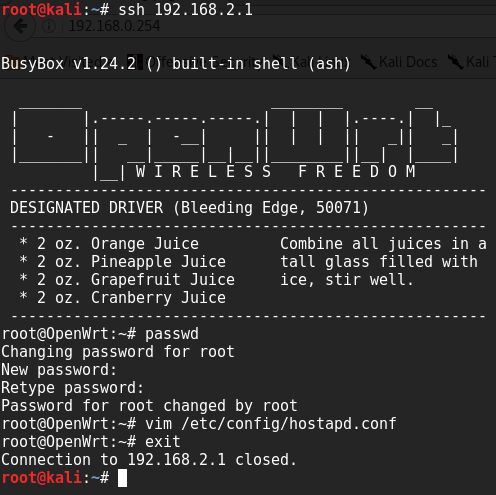
After hitting the upgrade button the router reboots and we lose the connection to the WI-FI. After another restart -we simply disconnected it from the plug- we have to sign into the default hidden WI-FI "Android_AP" using the password "actuallyAsniffer" and assign ourself an IP address in the 192.168.2.0/24 range except 192.168.2.1 since that is our router. After a connection is established we connect to the router via SSH to change its root password and the WI-FI configuration.

Now our sniffer is fully functional. Therefore our next step is to place it somewhere where we would like to listen in our example behind a printer using the LAN cable shipped with the router.

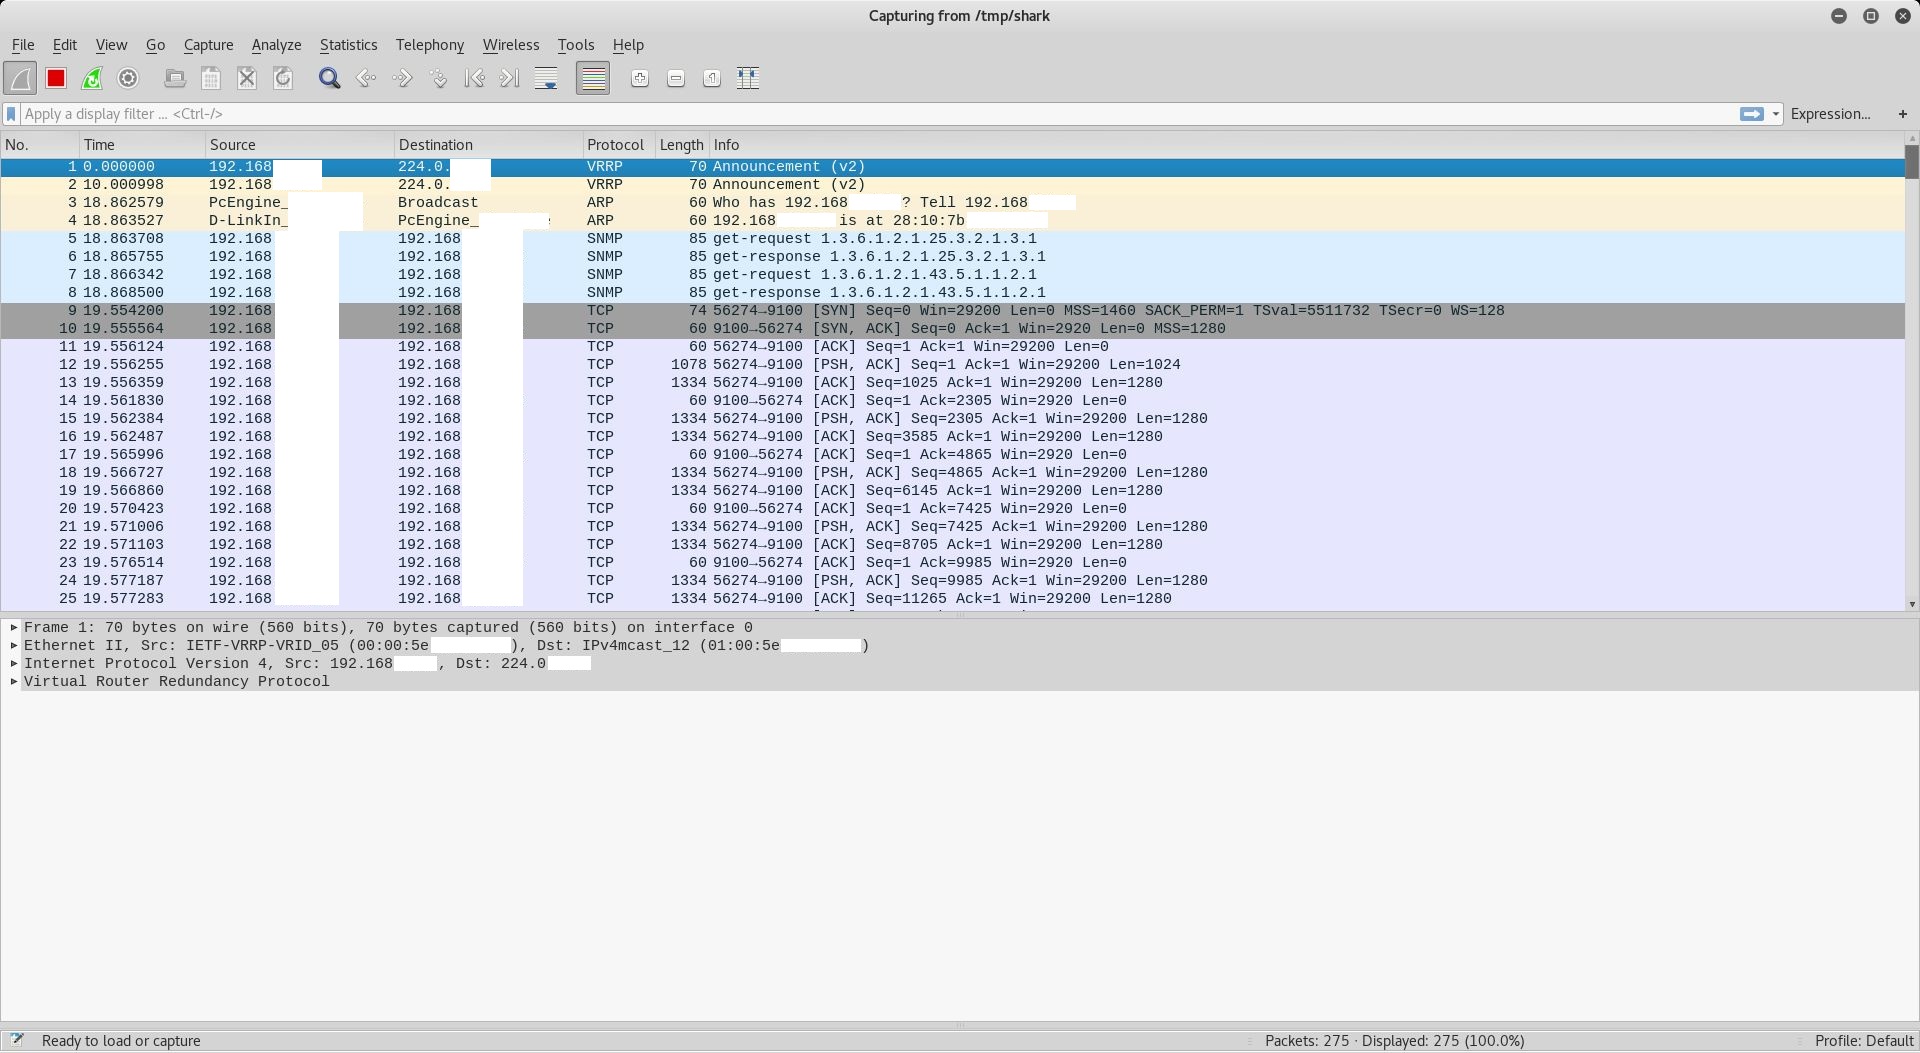
After doing so we connect to the AP, create a fifo and tell Wireshark to listen there. Then we tell our sniffer to start sniffing and pipe the results into Wireshark. The process is the same as in the last article.

Now we got incoming traffic as someone starts to print a document.

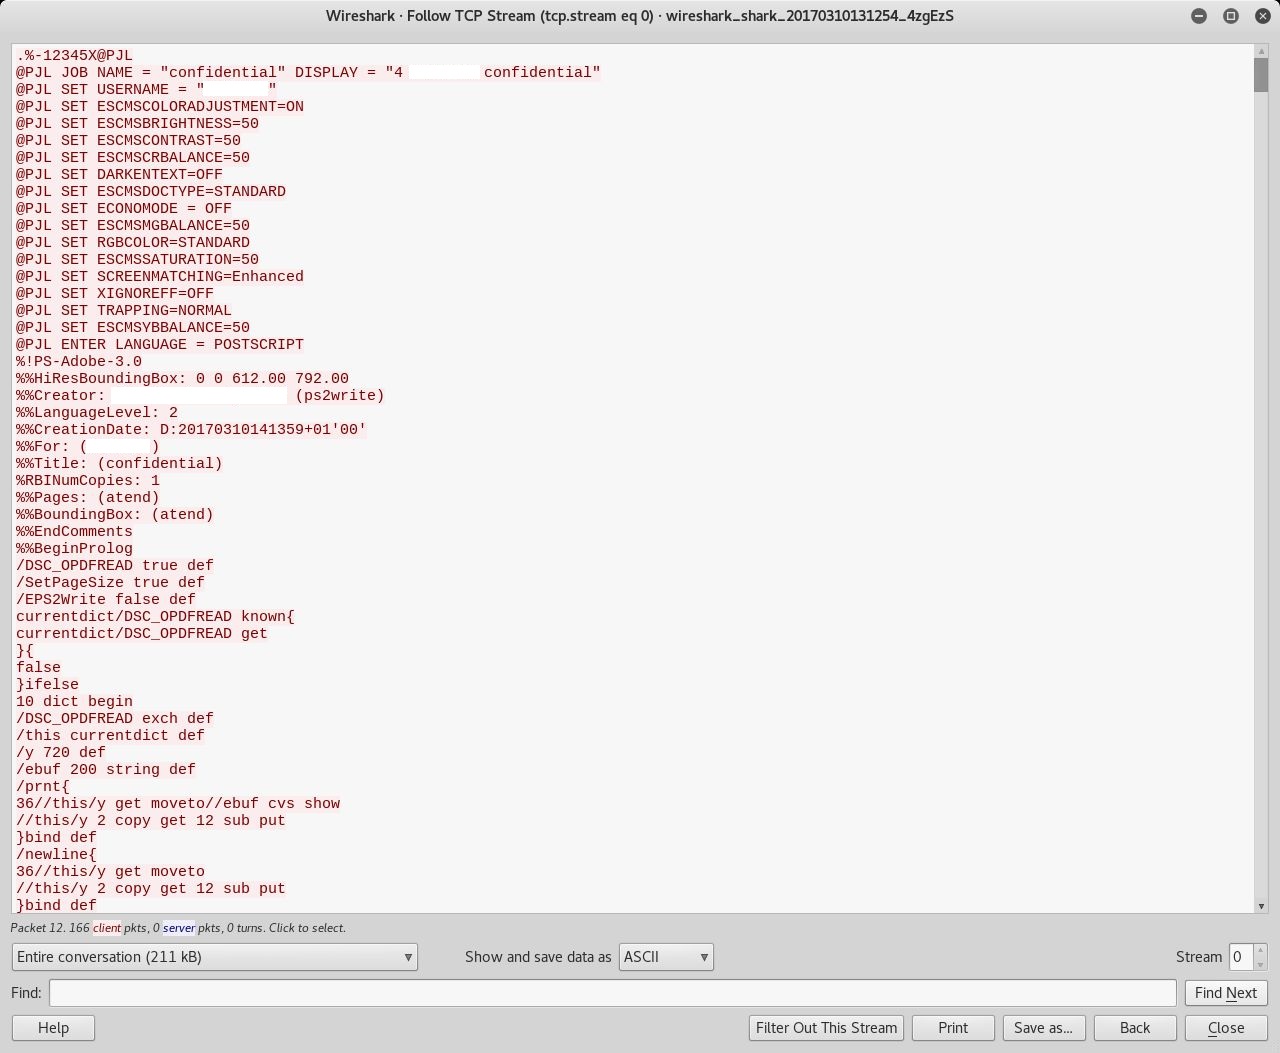
Via right-clicking on one of the tcp packets we tell Wireshark to follow the tcp stream and save the file as note.ps

Before we use the command line tool ps2pdf to convert our document from postscript to pdf we will have to remove the first and the last two lines from our file since they are junk. After removing said lines we can convert the file back into a pdf and view its secrets.


With this we conclude our article and wish you all happy sniffing.


